Tools
Tools for interacting with, exporting, and exploring the map and it's features.
Produces a paper map or a PDF of the map.
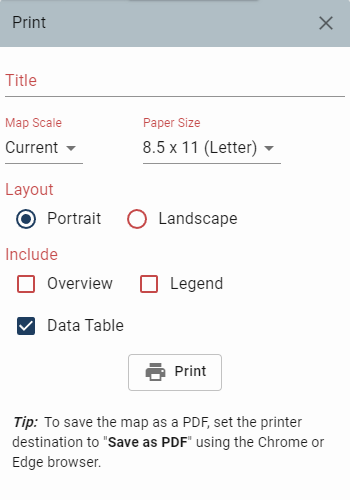
Prints a map with an optional title.
Print Settings/Options:
-
Map Scale
- The default map scale is the initial scale of an area when navigating to the area.
- To set a scale other than default, choose the desired scale from the dropdown menu.
- When the scale is selected, the map will be displayed at the specified scale in the Print Preview window.
-
Paper Size
- The default paper size is 8.5" x 11". Click on the dropdown to select an alternative paper size.
-
Layout
- The default page orientation is Portrait. To change the orientation to Landscape, click the Landscape button.
-
Overview
- This option adds a small overview map to the printout.
-
Legend
- This option adds the legend to the printout.
-
Data Table
- If a feature is selected, you will see the option to include the data table.
- However, it is recommended to leave this option unchecked, print only the map and download a CSV file if descriptive information is required.
Web Maps
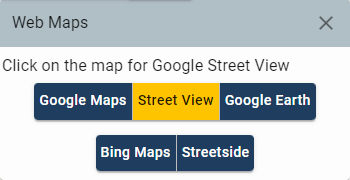
Provides a direct link to use Google and Bing's mapping applications from a specified location on the map.
- Select Web Maps from the main menu or on the menu bar.
- Select the application you want to use.
- In the map, click on a location or point of interest.
- The selected application will open in a new window at the location that was clicked.
Compare Maps
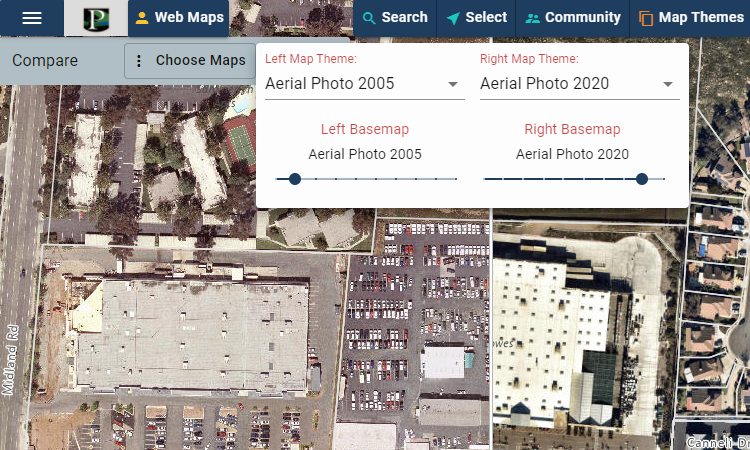
Enables you to easily compare different imagery basemaps in the map.
- Select Compare Maps from the main menu.
- Select the imagery that will display to the left of the slider.
- Select the imagery that will display to the right of the slider
- Pan the map and drag the slider left and right to compare the imagery on the left to the imagery on the right.
Sketch
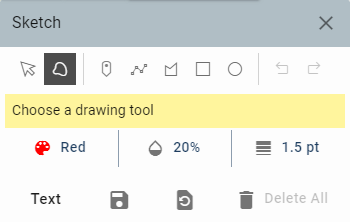
Provides the option to draw graphics and enter text on the map.
-
Drawing a Point
- Click the Red dropdown to choose the point color.
- Click the Circle dropdown to choose the point shape.
- Click the 14pt dropdown to choose the point size.
-
Drawing a Line
- Click the Red dropdown to choose the line color.
- Click the Solid dropdown to choose the line design.
- Click the 2pt dropdown to choose the line width.
-
Drawing a Shape, Square, or Circle
- Click the Red dropdown to choose the shape color.
- Click the 20% dropdown to choose the shape opacity.
- Click the 1.5pt dropdown to choose the shape line width.
-
Creating Text
- Click the Text button to view the text options.
- Click the Black dropdown to choose the text color.
- Click the Sans-sarif dropdown to choose the text font.
- Click the 14pt dropdown to choose the font size.
- Type text in the text box and then click on the map where you want the text placed.
Elevation Profile
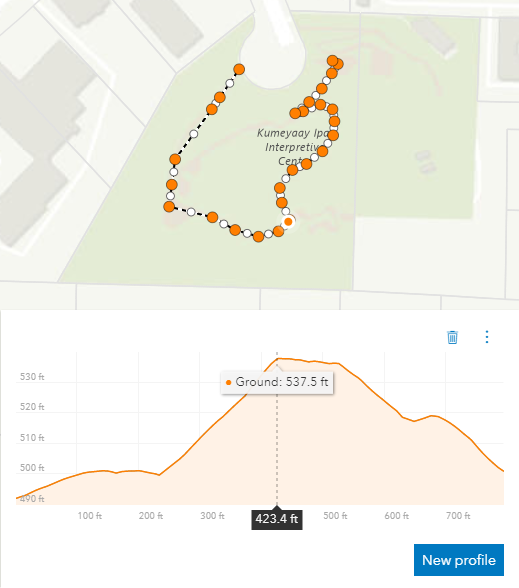
Generates and displays an elevation profile from an input path.
Hovering on the chart shows an overlayed tooltip with elevation values of the profile, and displays colored dot markers of the matching positions on the map.
- Select Elevation Profile from the main menu.
- Click the New profile button.
- Left click once in the map view to start a profile.
- Left click again to change the profile direction.
- Double click to finish the profile.
To close the Elevation Profile tool, click Hide Elevation Profile in the main menu.
Measure
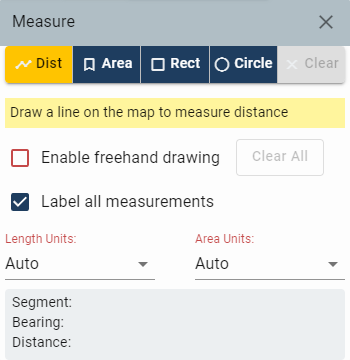
Provides the ability to measure an Length, Area, and display Longitude and Latitude coordinates on the map.
-
Measure Distance
- Select the Distance Icon.
- Click to Start and Double Click to finish measurement.
-
Measure Area
- Select the Area Icon.
- Click to Start and Double Click to finish measurement.
-
Measure Area of Rectangle or Circle
- Select the Rectangle or Circle Icon.
- Click to Start.
- Move pointer to make the shape larger or smaller.
- Click to finish measurment.
- Use the "Length units:" and "Area units:" dropdowns to choose the desired unit of measure.
Show Coordinate Display
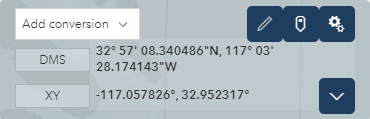
Displays the cursor position either as map coordinates or as any of several popular coordinate notations.
Converts user input coordinates into a point on the map.
- Select the gears icon to change the coordinate format that is displayed.
- Click the map pin icon to toggle between capture mode and live mode.
- Click the pencil icon to enter coordinates, convert them, and optionally zoom to them.